Job Processing Guide
How to process an existing job
This guide describes how to process a job using the Auto Job Management dashboard.
1) Job Creation
A job can be created in three ways:
Automatic job creation: This requires 'generate jobs' to be enabled in the warehouse user codes and will create jobs based on existing demand.
Manual job creation: You can create a job through Job Entry or Quick Job Entry.
MRP Job Creation.
When a job has been created, please make sure that the Scheduled, Engineered, and Released checkboxes have been set before processing.
2) Inventory Transfer Creation (optional)
If you want to attach an inventory transfer to the job, complete these steps:
NOTE: The job transfer file will NOT be sent to the Storage Warehouse until you tick 'user confirmed' AFTER completing this step.
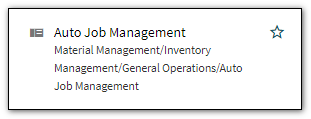
a) Open the Auto Job Management Menu.
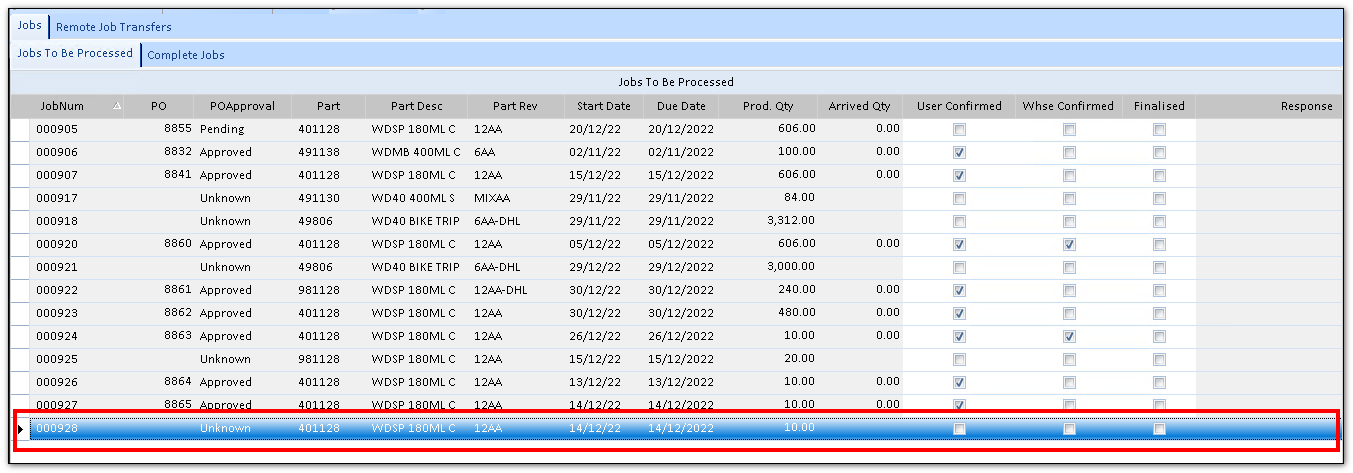
b) Select the job you would like to attach the transfer to.
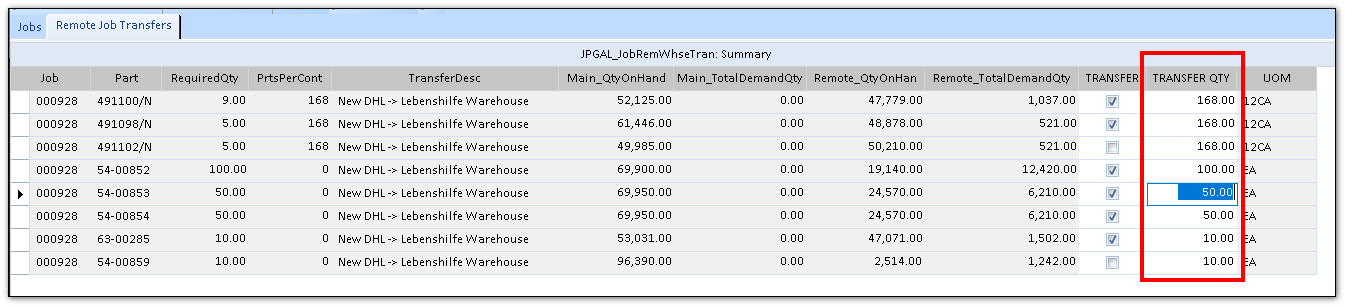
c) Open the Remote Job Transfers tab
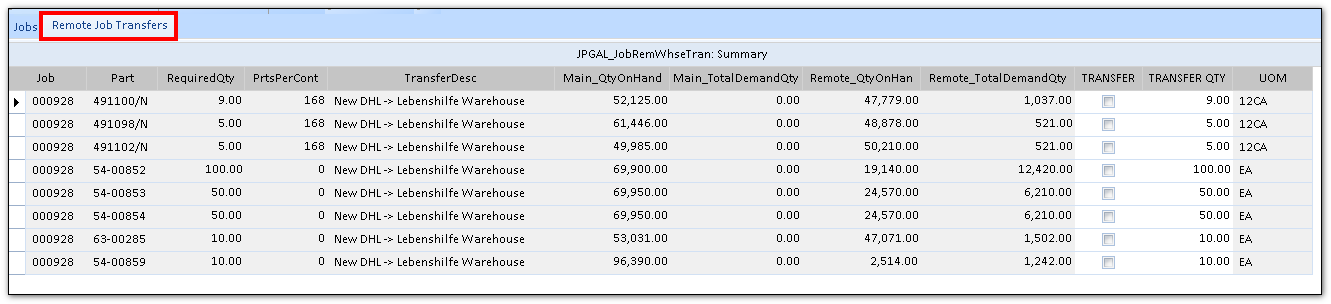
Note: You can review the upcoming transfers for each part by selecting the part and opening the Upcoming Job Transfers tab.

d) Tick all the parts you want to transfer
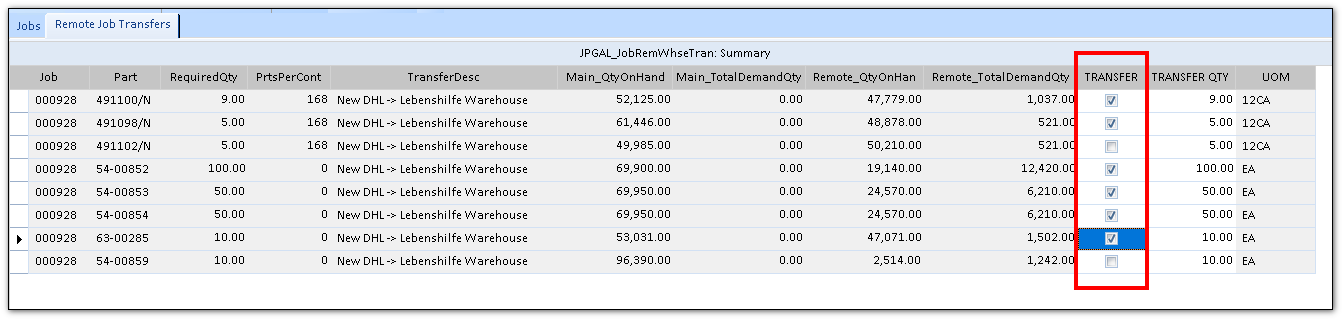
e) Set quantities you would like to transfer
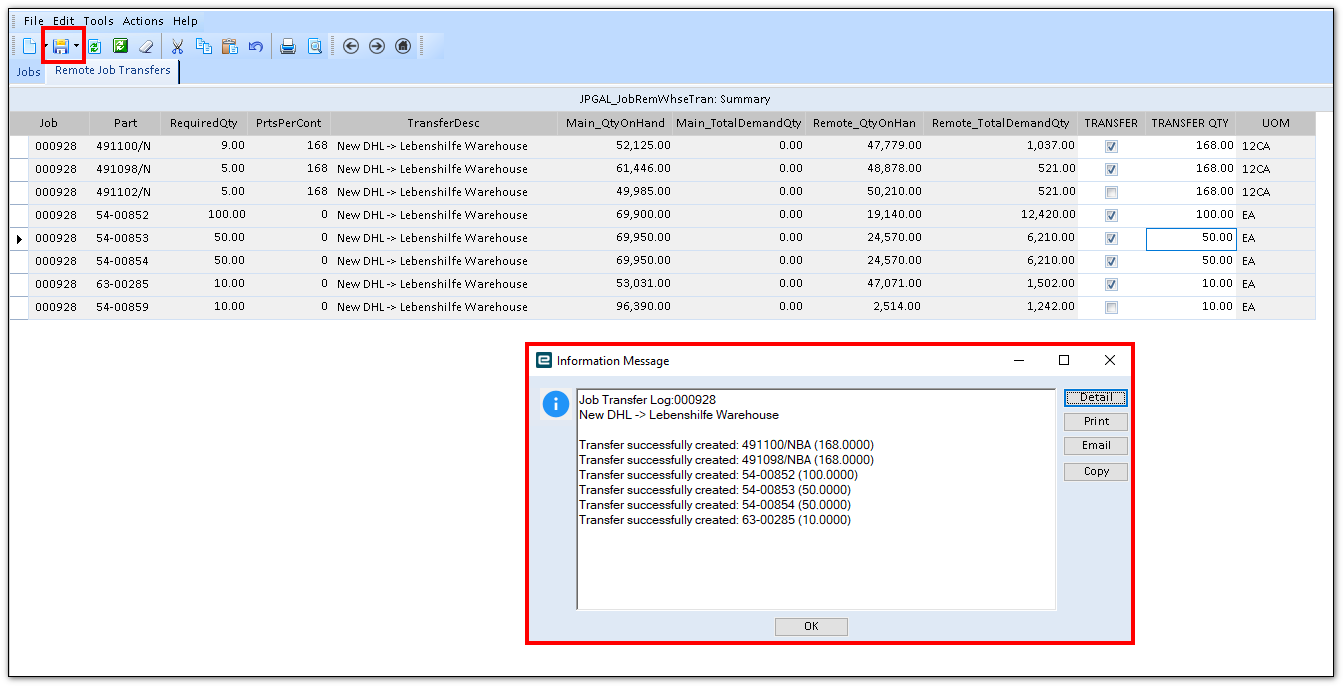
f) Click Save, and you will see the below message.
3) Internal Confirmation
NOTE: If you would like to send a job transfer file to the storage warehouse for this job, please complete step 2 BEFORE this step.
a) Open the Auto Job Management Menu.
b) When you are happy with a job, tick user confirmation and click save.
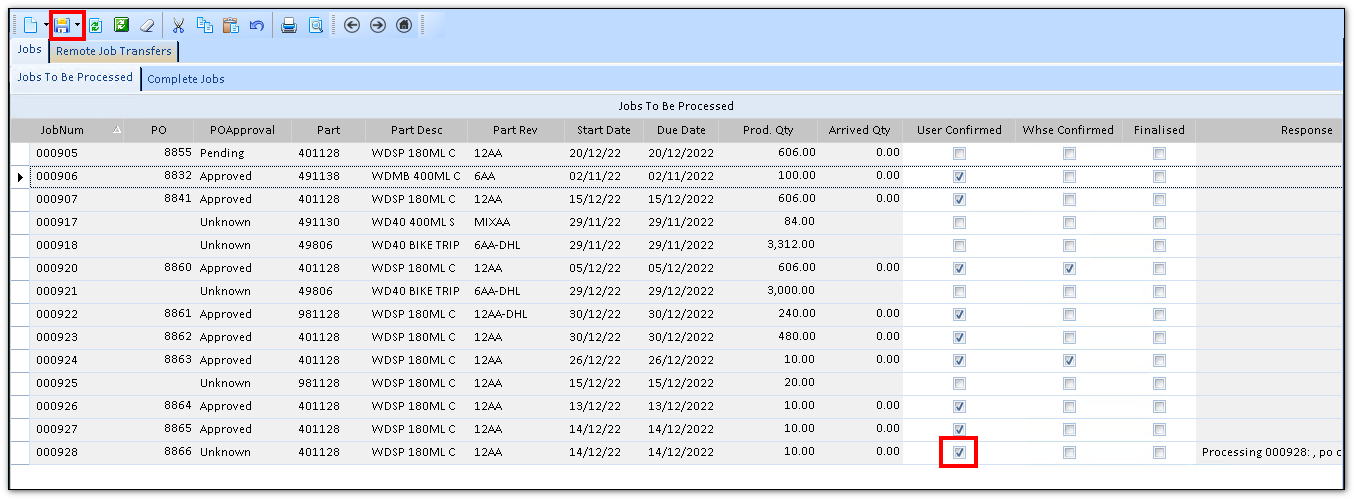
This will:
Reserve the material for the job (if configured)
Create the PO
Output a Job CSV file
Upload Job CSV to the warehouses FTP (if configured)
Send Job request email to the warehouse (if configured)
Send Job Traveller email to the warehouse (if configured)
Create and transfer a Job transfer file (if configured and the Inventory Transfer step has been completed)
The process message and any errors can be seen in the Response field.

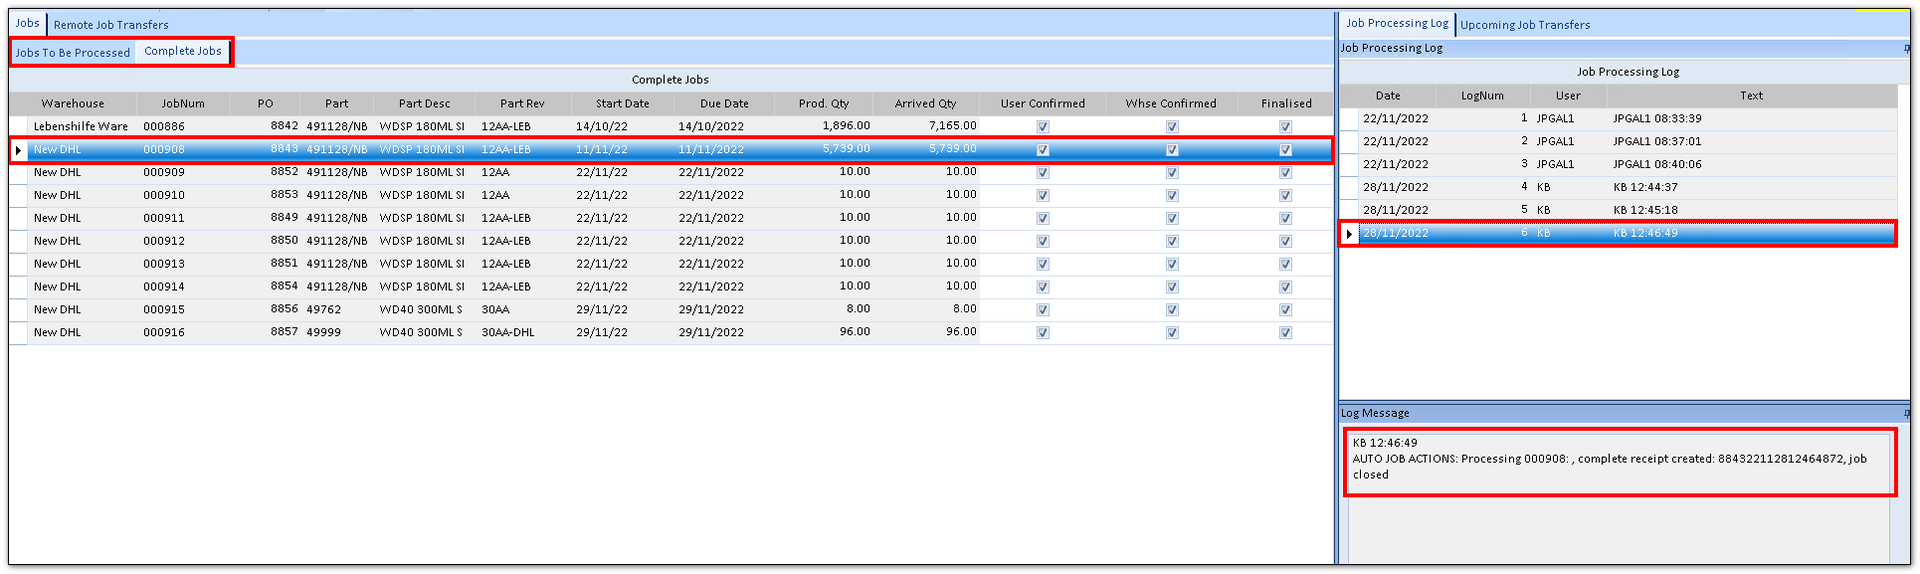
All previous processing messages can be seen for a job by selecting the job in the Jobs to be Processed or Complete Jobs Tab and select the logs in the Job Processing Log tab.
4) Warehouse Confirmation
a) Open the Auto Job Management Menu.
b) When the warehouse has confirmed they are able to do the job, tick warehouse confirmation and click save.
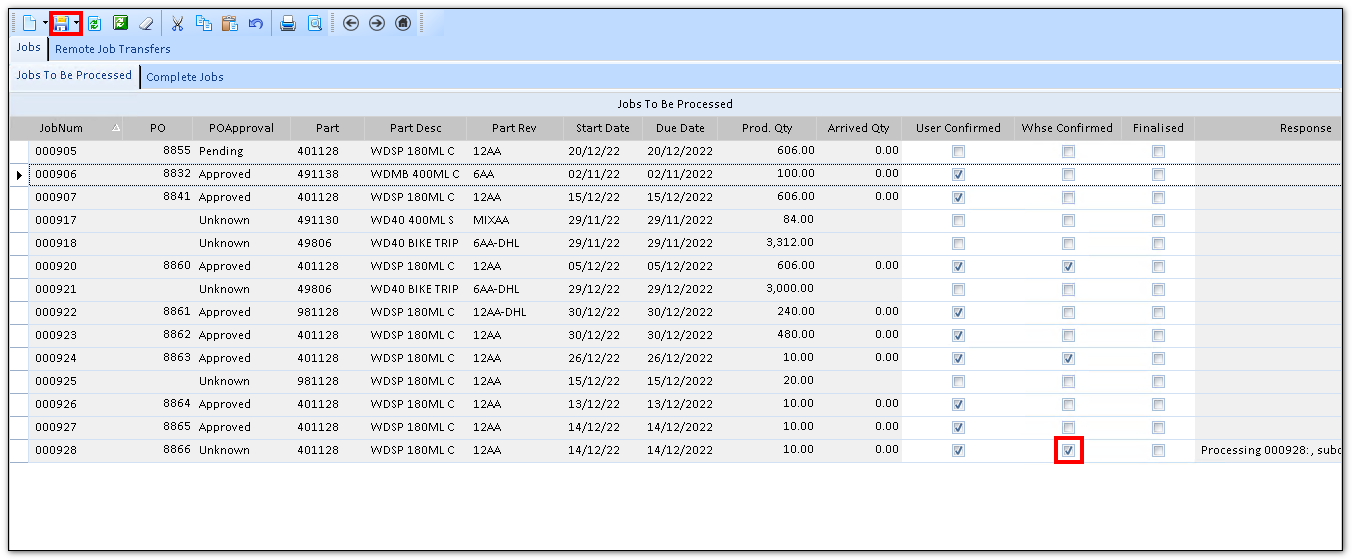
This will:
Create the subcontract shipment
Transfer material (if configured and the Inventory Transfer step has been completed)
Issue material to the job
This step will be automatically completed if the job is finalised.
5) Job Finalised
a) Open the Auto Job Management Menu.
b) When the warehouse has completed the job, tick finalised and click save.
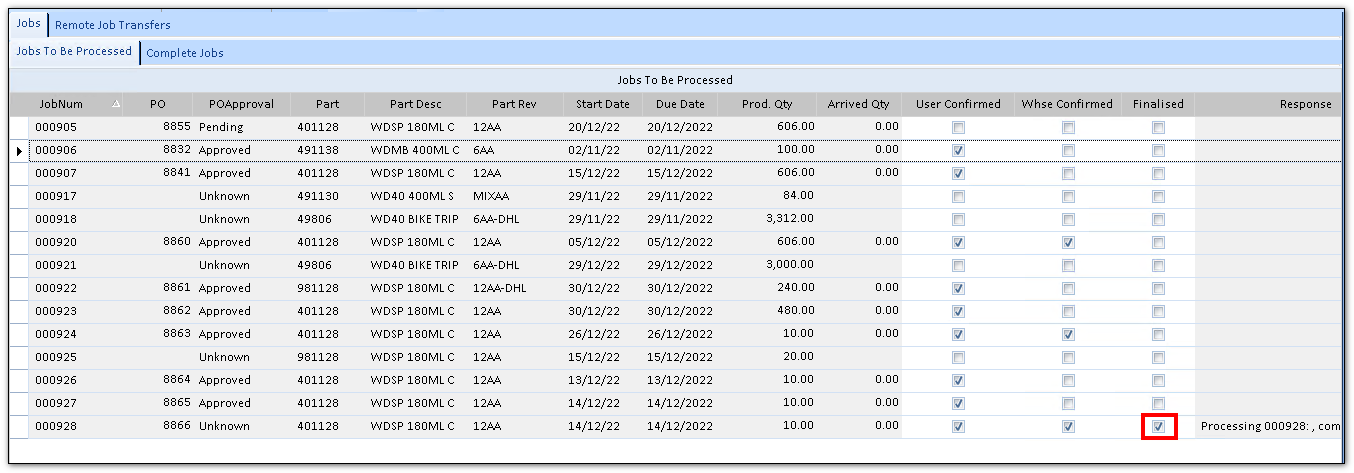
This will:
Create a receipt for the outstanding unreceived PO quantity
Complete and close the job
This step will be automatically completed if the sub-contract receipt is automatically received.